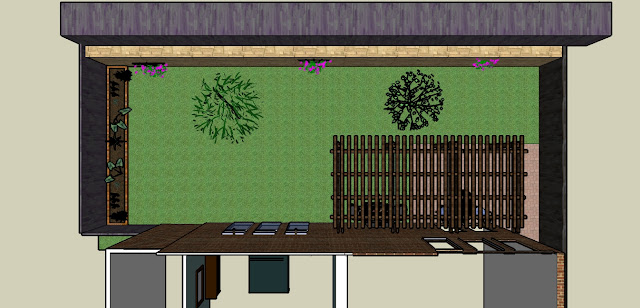
Side Elevation
Back Elevation
I knew most of the restrictions for our neighborhood after looking on the city website, It had to be 10' from the back fence and 3' from the side fences. The only thing I didn't realize until we were getting the permit was it couldn't be connected to the house. If it was connected to the house it had to be 20' from the back fence which is my entire back yard. So, even though the drawings don't show it, I added four more posts next to the house so it is close but not attached.
The lumber we used
(8) 6X6X12
Treated Lumber
(8) 2x8x10
Treated Lumber
(12) 4x4x8
Treated Lumber
(28) 2x4x10 Treated
Lumber
First my husband dug the eight holes in the back yard for the posts. We used Simpson Strong Tie 6x6 posts and he installed them after an inspector from the city came to look at the holes.
Close up.
Here are the posts once he got them up.
We used 8 inch bolts two in each post. This costed more than I thought it would they were like 2$ a piece not to mention the cost of the nuts. But, I estimate, we still spent less than 1000 on the entire thing. So it was a win in my book.
Next came the cross beams. One bolt held up two beams, one on either side of the post. We either used 10" or 12" bolt I can't remember.
We used self drilling wood screws to attach the next bunch.
Finally, we attached the shady part! I think it turned out great!
That's all we've done for now, but we have had the final inspection and it was approved! The next thing we have to do is add the rest of the patio stones under it, we've already started killing the grass there so it won't be as difficult!
I may cover up the brackets low to the ground by adding some molding around the bottom of each one so you don't see it. But, it doesn't seem to bother me as much as I thought it would so I'm not sure if I am going to.


